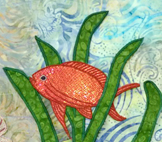
I love both, but am often frustrated by the size limitation of in the hoop embroidery. So, when a while back, I wanted to make this wall hanging of an underwater scene I started thinking of ways around these limitations.
Then it struck me, why not embroider the various items in the hoop and then applique them to the background. It worked very well.
The whole idea started when I first saw the blue fabric. It made me think of a reef scene. The plan was to make the picture and to write a pattern to sell. Well, the picture got made, but there was never enough time to finish writing the pattern. So I decided to explain a few of the steps here. Perhaps, it will inspire some others to step out of their comfort zone. This method can be used for many different types of pictures. How about a garden scene, or something for a child’s room?
I started with Timtex or Peltex for the background instead of batting. This gives a nice solid base and best of all it is easy to stitch through. I fused the blue “sea” fabric to the Timtex. For the bottom part I cut different shapes from various greens, blues, browns, and even purple scraps of batik fabric to get some color variations. I overlapped all of them a bit so no white Timtex was showing. These were also fused down. I stitched around all the edges with smoke colored monofilament thread to make sure everything would stay in place and stitched some curved lines over the blue fabric.
All embroidered designs came next. I first studied a lot of photographs on the web and then drew my own versions in CorelDraw and digitized them in my Bernina Designer V7 software. If this seems too complicated you can, of course, buy and use ready to embroider designs. I stitched all of them on wash-away stabilizer, the mesh type, not the film. The fish also had a layer of Mylar, to give them a bit of shimmer. If there is any interest in how this is done, I may go into a bit more detail in a future post. The only design that had any fabric was the green seaweed and it barely fit into my largest hoop, but I could have made the pieces shorter and overlapped them to give them more height.
After all the designs were embroidered, the stabilizer washed away and the designs dry, it was time to play with the layout. Because these were all separate pieces it was easy to move them around until I was pleased with the layout. I then stitched them one by one to the background with monofilament thread and a narrow zigzag stitch. I had planned to stitch all around each piece, but ended up stitching them down only in some places which gave the whole image a bit of a 3-dimensional look. I suppose you could also glue or fuse them down, but I have not tried that so I can’t comment on how that would work.
After I had added a narrow black binding to the piece I decided that I really wanted the whole thing a bit bigger. So I cut another piece of Timtex a couple of inches larger on each side than the original. I fused matching fabric around all sides to simulate a border and placed it under the front piece. I was able to stitch the two pieces together just next to the black binding of the front piece and had no problem stitching through all layers. I folded the border fabric to the back and covered the back with another piece of fabric that I sewed in place by hand.
Here are a few more pictures of the embroidery.
If you have any questions, please ask in the comment section.
My email address is on my website: http://www.quiltersniche.com. You can find it in the Contact tab.


Very nice. Your timing is perfect for me as I am finally starting to play with my Bernina V7. I love your wallhanging. Thank you for sharing.
LikeLike