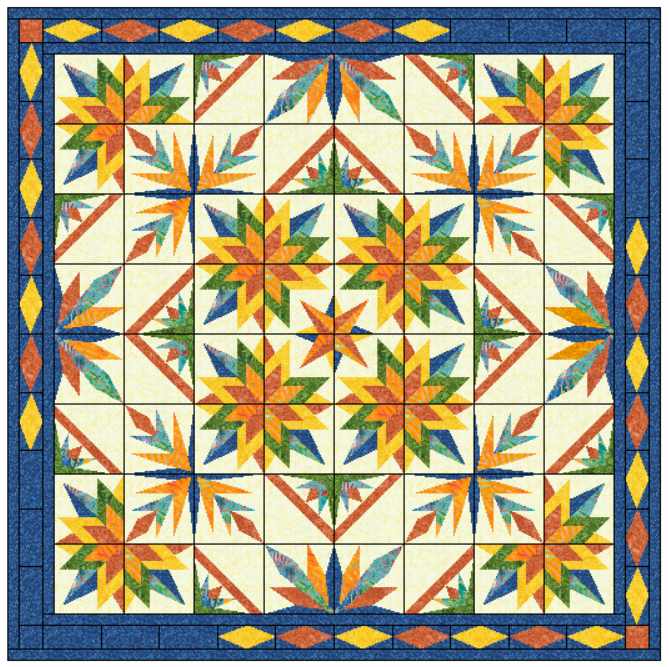
In February I mentioned that I planned to design and make a paper pieced quilt. I now want to show you my progress and pass on some things I have learned (sometimes the hard way). I started by drawing the center block in Electric Quilt 7 (EQ). I love EQ and have been using it for many years and have designed a whole lot of quilts in it, but very few paper pieced ones. I started with the center block and slowly added surrounding blocks. When I did not like a block, I just kept drawing a different one until I came up with one that pleased me more. I only had to design a quarter of the whole quilt as it consists of identical quadrants, like a large 4-patch. Once I had a quilt that I liked I then printed it out and EQ added the seam allowances where required and I was able to start piecing. At first I printed on copy paper, but found it stiff and hard to pick out. So I switched to ordinary tracing paper. I had a couple of tablets that I had bought at Michael’s for just a few dollars each and they worked great.
Here is the first block: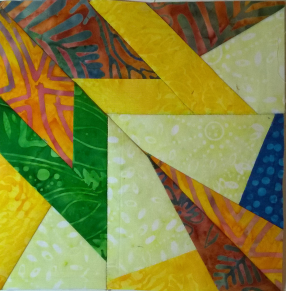
A block can be divided into several segments:
 A1, A2, and A3 belong to one segment. B1, B2, and B3 are also one segment and C1 and C2 are another segment.
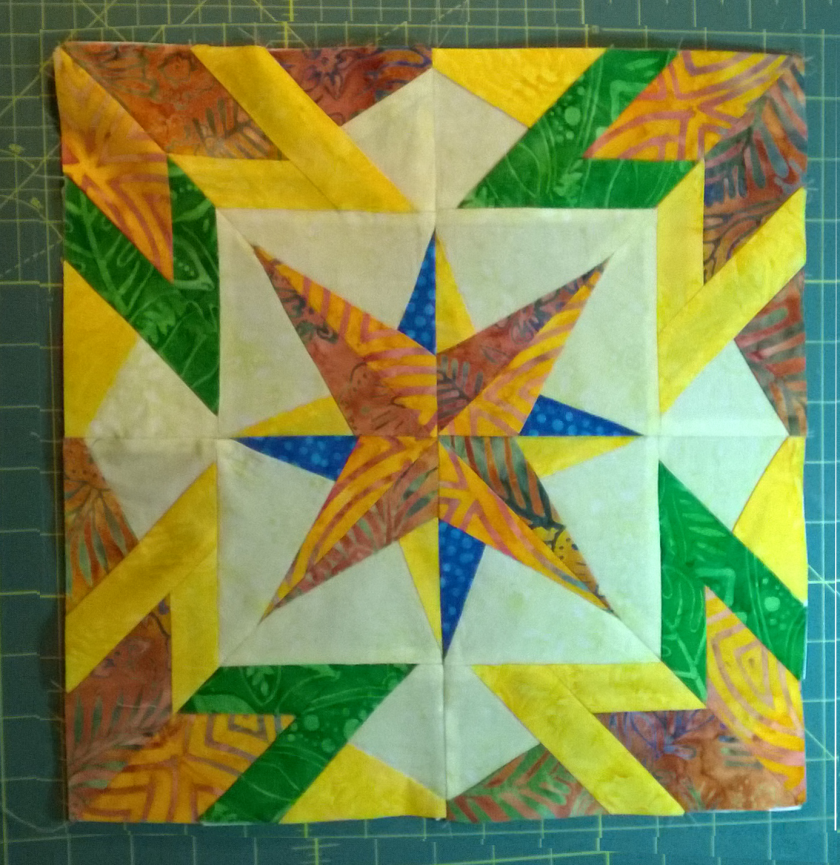
The center consists of 4 copies of Block 1:
What I learned so far.
- If you are new to paper piecing, watch some videos on YouTube. There are lots of them.
- It is important to reduce the stitch length as it is easier to rip the paper out when it is time to remove it. The default stitch length on my machine is 2.5 and I lowered it to 1.8. You can go even lower than that, but be aware that if you ever have to remove some stitches it is almost impossible to do so.
- Organize. Stack the pieces that belong together in neat little piles together with their paper templates.
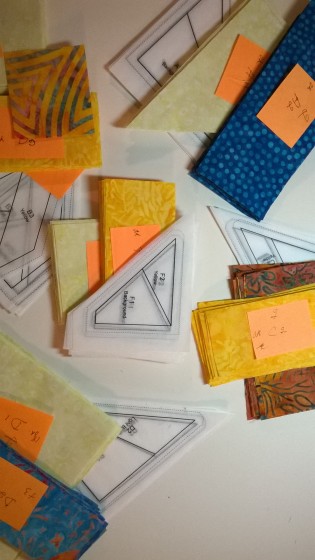 Well, this is not so tidy, but they are stacked together.
- Work on one block at a time so you don’t mix up the pieces of different blocks.
- When stitching over a line, follow that line exactly to make sure you end up with the correct size block.
- Press carefully so the seams are as flat as possible.
- When sewing the segments together, I first fold back the paper seam allowances or cut them off as they are very difficult to remove after the segments are sewn together.
- Do not remove the outside paper and fabric seam allowances of the blocks just yet. All the blocks should measure 6 1/2″ square before you sew them together so an extra bit of fabric may come in handy if you have to fudge the size of the blocks somewhat.
The fabric I used is Happy Hour, my daughter’s latest line of fabric by Timeless Treasures. I love it and I guess I am not the only one as Cozy Quilt Shop quickly sold out of most of the colors I needed. I have been assured that more is on the way.
I’ll post pictures of more blocks when I get them done.
Happy Quilting
Georgette

Thank you so much for showing your progress on this beautiful quilt. I am sure you must spend hours designing. I look forward to seeing more.
LikeLike
Thank you Gloria. I love designing, so it is not really work.
LikeLike
Very pretty, Georgette! Have you made a special quilting design for it yet? Let me know if you need a quilter to do your sample. Mona
>
LikeLike
Thank you Mona, you do beautiful work, but I do not yet have quilting designs for it. I am still in the piecing process.
LikeLike
What a lovely qult! Let’s know when you are selling the pattern!
LikeLike
Thank you Aline. It will probably be a couple of weeks before I can release it. I am still in the piecing stage and want to make sure everything goes together as planned.
LikeLike