A big thank you to all who followed my attempts at this blog. However, with my new website and regular newsletters I just don’t have the time to keep it going. There are only so many days in a week and hours in a day. You’ll find some good information and tips here and I’ll keep it online as long as WordPress will allow it, but will not add more posts. If you want to stay informed on what I am up to, I hope you’ll check my website, http://www.quiltersniche.com, or subscribe to my newsletter. There is a sign up form on my site.
Georgette
Sea Stars – Quilt
Here is another video by my daughter, Daniela, of Cozy Quilt Designs.
You can watch it on YouTube. Just click on the link:
https://www.youtube.com/watch?v=vne8z6UAkqI
I love the design and the colors. The pattern is available at cozyquilt.com .

And here is another one designed by Daniela. This one is paper pieced. It is just a preview as it has not been released just yet, but it will be soon.

My little contribution is the Edge2Edge quilting design. I named it It’s a Gem (itsa gem, for short). I often have trouble coming up with names for my quilting designs, but this one was a no brainer.

Keep on quilting, everybody! I have been told that people who have a hobby are happier people and I believe it. When I get creative I forget about everything else. All the little problems, and sometimes even big ones, fade away.
Until next time,
Georgette
P.S. If you are a computerized longarm quilter, check out my website: http://www.quiltersniche.com. All my quilting designs are digital, but if you don’t have a computerized system I can provide a PDF that you can use to make your own template.
How to avoid wavy borders.
Fabric can stretch. It can happen from handling the quilt top, from ironing, or because there are a lot of bias seams. No matter how carefully we handle a quilt top, there is always a chance that the sides are stretched out of shape. If they are a bit longer than they should be and if you then just add the borders they could end up wavy. A little bit of extra care is necessary to avoid this.

Measure the quilt top in 3 places, top, bottom and center. Add the 3 measurements together and then divide by 3 to get the average. If you get a really weird number, round it off to the next 1/8”. Cut two borders to this exact size. Before you add the borders to the quilt, find the centers on the quilt top and mark with a pin. Then, find the half way spots between the center and the top and the center and the bottom and mark those also with pins. Repeat this for the two borders, but only on the sides that will be attached to the quilt. Pin the borders to the quilt top matching the pins. Ease in any fullness. Add more pins, if necessary. Stitch in place.
Press the borders and repeat the same procedure for the remaining 2 borders, but don’t forget to add the widths of the borders to the width of the quilt top.
Setting and corner triangles
Let’s say you are making a quilt with 4″ square blocks that are all turned on point. The main block is easy, you just add 1/2″ to the finished size, so you cut them at 4 1/2″.
Then you have to decide what size the triangles on the sides and corners should be. You would start again with the finished size of the main blocks and for the side setting triangles you add 7/8″ to that measurement and slice the blocks in half diagonally.
For the 4 corner triangles you add 1 1/4″ to the 4″ so the block to cut is 5 1/4″. You then slice that block twice from corner to corner to get the 4 corner triangles.

If you like, you can also add a little bit more and trim the blocks later, or you could leave a little bit of extra fabric above the points to float the blocks.
If you need more information I highly recommend and article posted by Robin Strobel. The link is:
http://blog.shopmartingale.com/quilting-sewing/how-to-calculate-setting-triangles/
If you are a longarm quilter with a computerized system, please check out the Welcome and New Designs pages on my website for special discounts: http://www.quiltersniche.com .
Happy quilting,
Georgette
Easy quilt binding with flange – no hand sewing

It’s been a while again. Time just slips by. Fortunately, this video show an interesting way of attaching a binding with flange and all without hand sewing. The video is by Laura Coia of Sew Very Easy. She has some great videos on YouTube and explains things very clearly. Have a look, the link is:
I also want to share a couple of pictures of my daughter’s shop, Cozy Quilt Shop. The San Diego quilters run is happening this week and the theme this year is On the Farm. All the participating shops decorate in that theme and Cozy’s decorations are always outstanding. Here is a picture of Daniela (with the pig tails) with 3 of her helpers, Kathy, Maureen, and Kara.

Kara at the welcome table:
They even have some live chicks:
That’s all folks.
Georgette
Some garment sewing – another hobby.
I love to sew, but I don’t usually have much time for it. So I had decided to take the month of December off to sew, do some other crafty things and, of course, enjoy the festivities which included not only Christmas, but the big wedding celebration of my step grandson, Lex, on New year’s day. It was a lovely month. Unfortunately, the day after the wedding, I got sick. The flue or a terrible cold – who knows, but I just felt awful and it took me almost a month to get over it. So now it is back to square one trying to catch-up again and finish everything that was left undone. And I am still sneaking in a nap now and then when I feel I need it.
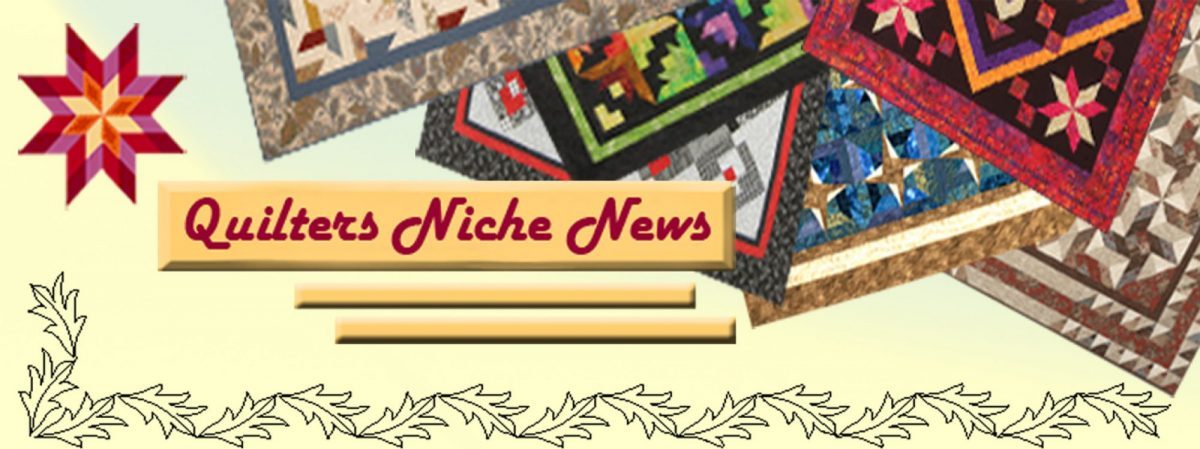
I did however get several garments sewn. I am so pleased with how they turned out that I want to show you a few of them,
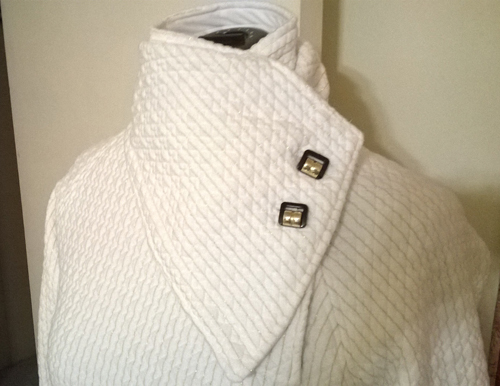
The first one, the black and white top shown at the top of the page is part of on ensemble of black slacks with a black and white top. The top was made from leftover fabric from another project, what a bonus.
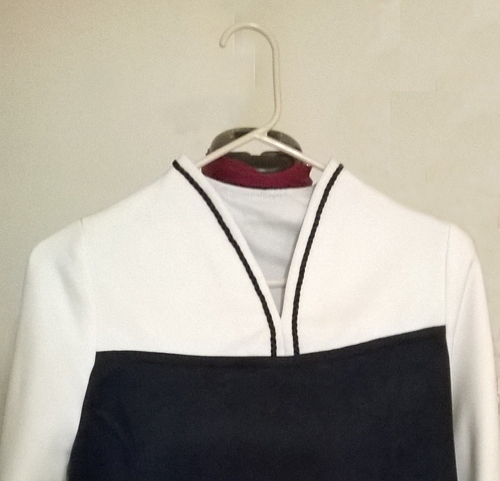
The next one is actually not new, but it was very plain so I jazzed it up a bit with some beads. Sewing beads is not my favorite job, but I was pleased with the result:
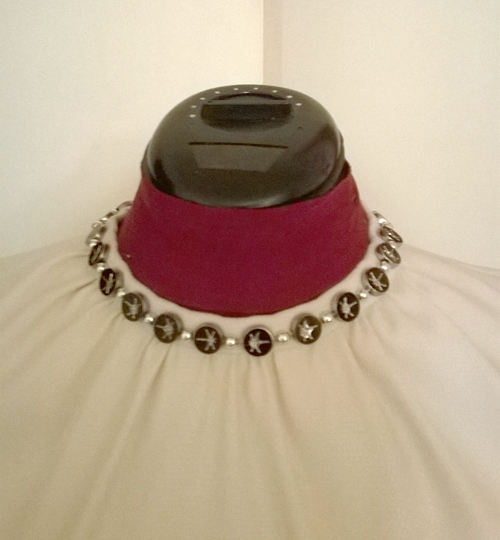
I love sewing sweaters from knit fabric. It is so forgiving and this one went together very quickly, but looked a bit plain also. Fortunately, I had a good bit of fabric left over and I had seen lots of scarves or neck warmers on Pinterest, so I decided that was just what it needed. You’ll find lots of pictures on Pinterest and some instructions, but mostly it is just draping it over your body to see how it looks. In case you are wondering how I made mine, I am including some quick directions and a sketch to show you.
Here are pictures with and without the scarf:
And here are the directions:
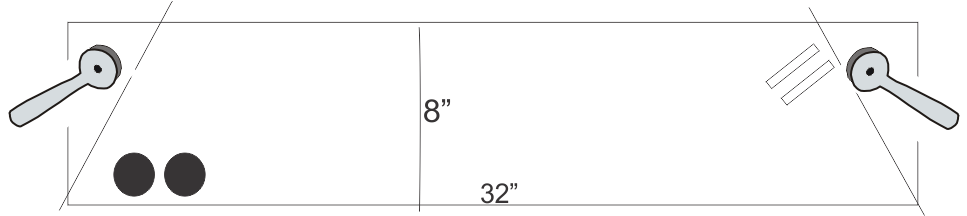
2 layers, approximately 8″ x 32″ (I used a thin knit lining for one).
Trim the corners at an angle as shown.
Place right sides together.
Sew close to the edge, leaving an opening for turning.
Turn inside out and top stitch along the edge, closing the opening at the same time.
Sew two buttons approximately 5″ and 7″ from the left edge.
Try it on to determine where you want the buttonholes.
Sometimes, buttonholes are hard to sew through thick material, but you can sew large snaps under the buttons instead.
This a very quick little project with lots of variations possible. Great for beginning sewists.
Have fun every one.
Georgette.
Christmas Cheer
WOW! I’s been and still is a busy time, but I did manage to get a Christmas project finished. A small wall hanging (18″ x 23″), stitched on my Bernina 780 using different techniques.
The Christmas branches were sewn with Razzle Dazzle, a heavier than normal thread that had to be wound on the bobbin and therefore stitched from the back. Once that was done I turned it around and free motion stippled the background from the front. The poinsettia petals and leaves were sewn separately and assembled into flowers and then later attached to the background to give a 3-D effect. The gold curls are regular embroidery files and stitched directly on the background. The holly leaves were embroidered as free standing applique that were attached by stitching a very narrow satin stich over the center vein so they sort of float over the background as well.
A pattern with full instructions, templates, embroidery files and tips on placement is available on my website at http://www.quiltersniche.com/Embr-Appliq-SVG/New-Embroidery.htm. It does require you to make some decisions on the exact placement of all the elements, but it should not be hard as you have the stitched Christmas branches as a guide. It does not require a large hoop as the branches are stitched on a regular sewing machine, but as they are sewn with a heavier thread you may have to lower the tension on your bobbin a bit or get a second bobbin you use only for bobbin work.
Merry Christmas,
Georgette.
Thanksgiving
Wishing all my U.S. friends a

I’ll be spending it with family and friends. I do hope you are too!
Georgette
Paper Piecing made easy
If you love the ease of paper piecing and the accurate results you get, but don’t enjoy picking out all the paper pieces in the end, don’t despair. I came across a video that I want to share with you. It explains a method that eliminates that last step. It still uses paper. You just don’t sew through it. Instead of sewing over the printed line, you fold the paper back on the line and sew next to the line. Another improvement is that instead of regular paper that you would secure with either a pin or a dab of washable glue, the video shows to use freezer paper that can be pressed to the fabric to secure it. It all looks so easy. I will definitely give this a try in the future. If you have already tried this method, I would love to see your comments on how you like it.
Here is the link: https://www.youtube.com/watch?v=mt5NvlBhAoM
Have fun and enjoy your weekend.
Georgette
Machine embroidery – bobbin work

It’s been quite a busy time again, as usual. I just posted new digital longarm designs to my website and I started to quilt my paper pieced quilt. That in itself is a new adventure as I am quilting it on a new to me system, the Bernina QMatic in my daughter’s shop, Cozy Quilt. The first session was all about finding out about how the system works. I had expert advice from Tammy who works in the shop, but I still only managed to get one block done in that first session. I am sure I’ll get better at it as I get more familiar with the system.
I’ve also been experimenting with bobbin work on my own Bernina at home. I’ve wanted to try it for a long time and had ideas for designs swirling in my head for some time. As you know, heavier threads such as razzle dazzle can’t fit through the needle and have to be wound on the bobbin. This, of course, has to be stitched from the back of the project and I was looking for an easy method to transfer the design to the reverse side. I found it when I discovered Sulky Sticky Fabri-solvy. It is very thin, but has a paper backing and can be run through a printer. The paper is then removed and the Fabri-solvy will stick to the back of the project and you can stitch over the lines with regular thread in the needle. Here is a picture of a little test sample.
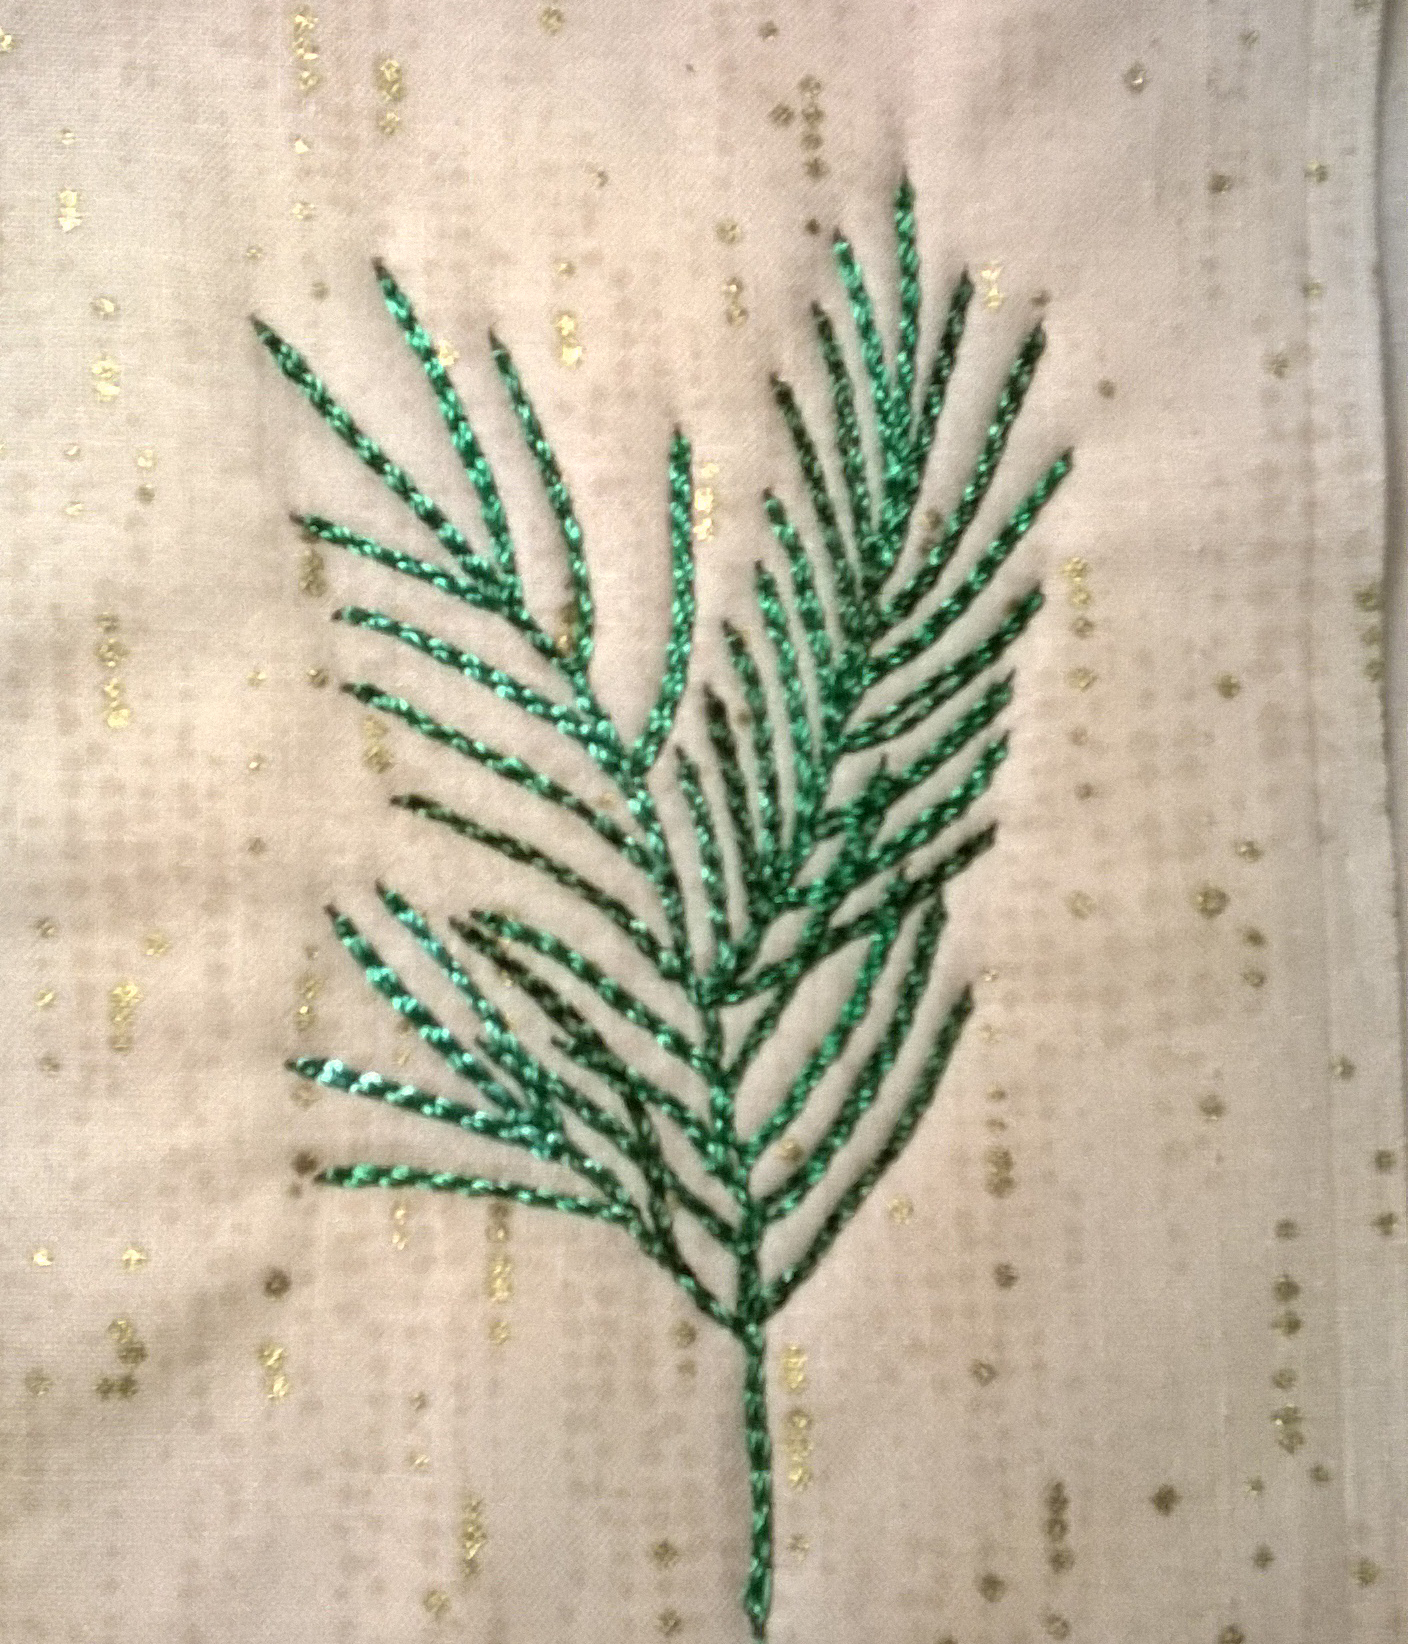
Isn’t it pretty? It will be combined with other techniques and become a Christmas wall hanging.
Until next time.
Georgette
